Wednesday, October 16, 2013

Crockpot Chicken, two meals in one!

Hi friends. So on Wednesday I decided to cook a whole chicken in my crockpot. I know what some of you are thinking: I don't eat meat! Ok, well, this blog post is probably not for you, unless you find a potato somewhere that looks, cooks, and somehow tastes like a chicken. Others of you might be thinking that touching raw whole chickens is super gross and undesirable. While you couldn't be more right, whole chickens can be less than a dollar a pound (ours was $0.95 a pound regular price at Aldi), plus, you can use your leftover meat and bones to make a whole second meal. So it's actually an amazing deal and totally worth the gross first part.

Unfortunately, I don't have pictures of this first and second step because I was home alone with the dogs and the wee babe I watch, so no one was there to take pics for me and I would've contaminated everything if I'd tried to do it with raw chicken on my hands.

First, take the thawed chicken out of its wrappings, take the bag out of the body cavity (it holds all the innards people use to make stuffing, gravy, and I always just throw it away because it's too gross for me), and give your bird a good rinse with cold water. It will be disgusting, and you will need to clean your sink afterwards, but it gets better, I promise.
Then, pat your bird dry with paper towels. Take a breath, you're almost done touching a raw chicken and you're saving lots of dollars. Hurray! 
After that, you stuff the chicken. I stuffed mine with stuffing I had leftover from thanksgiving of last year. Don't overthink that last bit, it hadn't expired, it was still dried and in the box, let's move on.
I cut up an onion (coarsly chopped, quarter-sized pieces) and threw it at the bottom of the crockpot with a 1/4 cup of water and a little garlic. I put garlic in almost everything, so if you don't, ignore the suggestion. However, if you ignore the garlic suggestion too many times, people will start thinking you're a vampire, and the Twilight fans will be lining up to make out with you, so watch out, garlic could save your life!
Anyway....I put the bird, stuffed and all, in the crock pot and then rubbed it with salt, pepper, poultry seasoning, and thyme. Here's what it looked like:
Here's another pic from another angle:
Always cook the chicken breast side up. It's polite not to leave your chicken friend lying face down in onions and garlic, plus, they cook better that way, so it's also good for you.
Another thing to note is that I add water at the bottom, but it's just as good to spray the crockpot with cooking spray and then stick the chicken in on top of that. The reason I use water is because it's calorie free that way, and that's always fun.
Your chicken is cooked when the temperature of its cavernous insides exceeds 165 degrees Fahrenheit. 
I sautéed some carrots using some of the same spices I used on the chicken as a side dish.
This was the finished product for day one. It was quite good.

After dinner, I started prepping for day two's meal.
Separate the bones and leftover meat from the skin and fat from the chicken.
Or, since it's kind of a gross job, have a dreamy man do it for you. I chose this dreamy man because he lives here, too, and we are married, so that means we have to do nice things for each other.
Add the bones to the extra stuff leftover in the crockpot from when you took out the chicken. Add about six cups of water, turn it to a low setting, and then let it cook for around eight hours. I just let it go overnight, and made sure to wake up decently early in the morning...which I do anyway...
Pour the contents of your slow cooker into a heat-safe bowl, straining while you pour. I just placed a strainer in the bowl I was using and lifted it up once all the pouring was through. Worked slick.
Stick your bowl of chicken broth in the fridge for as long as it takes for the fat to rise to the top.
This is what the hardened fat will look like. It took the fat from my bowl of chicken juice about a day to harden to perfection.
Using a slotted spoon, scoop up all the fat from your bowl.

Now it's time to make chicken soup! 
Collect these materials: 5 stalks of celery, 1 onion and 5 carrots. You can peel the carrots if you want, but I don't bother, I just give the celery and the carrots a good scrub and get on with it.
Cut your veggies up into happy little soup chunks like this. Yum. I truly believe that most food looks better when presented on a blue surface. Ok! Moving on!
Stick all your veggies in your crock pot, add four or five cups of your home-made chicken broth, and turn it on to a low setting. Not your lowest, but, you know, low. Mine only has four settings, off, warm, low, and high, so if you have a nicer crock pot with a bunch of extra settings, just guess. It's hard to mess up a slow cooker recipe. 
Add a half a bag of egg noodles after your veggies have been in there for at least 2 hours.
Cut up at least 2 cups of the chicken meat you saved from the whole chicken you made earlier. Add it at the same time you add the noodles. Stir it all in and wait about an hour.
One that time is up, your soup will be ready for you to enjoy, so please do just that! Happy cooking! Happy saving!


Autumnal Decor

Hi friends. So, I love decorating for different seasons, and since we're smack dab in the middle of Autumn, I thought I should show you some of the fall decorations I have up.
First of all, here's my couch. The yellow pillows I use for spring, summer, and fall, because yellow is so versatile. The quilt I made myself recently. I've only made four quilts, but each one has been an improvement. Here's a couple close up shots of the quilt:
Much to my family's surprise, i finished the quilt in one sitting. Usually I start a quilt and leave it laying around for ages before I get back to it. Not so for this quilt.
This is a little wreath I made years and years ago with a few friends at "Autumnal Fest". I hang mine up somewhere every fall.
This is the candle jar iron pumpkin scene I have going on on top of a bookshelf in the center of our living space. I got the wrought-iron pumpkin from a Goodwill in Bloomington, IN last spring and have been excited to use it ever since. The blue jars are from our wedding and have yellow leaves from the ground outside our back door in them, the orange metal lanterns I bought as I was buying others just like it for my friend Rachel's wedding, and the black lanterns are from our wedding. So basically, a lot of it is reuseables, which is pretty exciting. I use the blue jars in almost every season.
The flowers on the long shelves behind the dining room table are autumnaly. That, of course, isn't really a word, and the blue flowers are actually pretty summery, but I added a crow...so I feel like that makes them creepy, and creepy is Halloweeny, and Halloween is in the fall, so it all works out.
The other crow is amongst the daisies that live in this pitcher next to a cow picture I made when I was three. Notice how I made the spots in nice neat rows. Typical Alicia.


Tuesday, October 15, 2013

Wedding Date Wall Art

Hi friends and bitter rivals. So, today I made some nice wall art only using stuff I already had lying around the house. Please either enjoy or deeply regret reading all about today's D.I.Y. Project.
This is the project completed, but not hung up. The frame was free, my mom got it from some lady from work who got it from Ikea but then decided she didn't want it. It already had the matting for the three 5x7 pictures, so I worked with the design.
First I found the pile of unused Save the Dates from when James and I got married. I cut off the photo-strips from a dozen or so cards. We made the cards by taking pictures on James' computer and then lining them up on Microsoft office. Super easy to duplicate. Anyway, I cut them off the cards, and then cut several in half and in thirds so I could mix tile them all mixed up together, like this:
I just stuck them onto the paper that came with the frame with a glue stick. Then I traced the numbers that represent our wedding date out on some pretty paper. I used the same stencils I used on my quote pillows. 
Then, of course, you cut out the numbers. I used a kitchen scissors, which was a risk, but it worked out just fine. Then you glus the numbers onto the picture collage, put it in your frame,and call it a day.
Here's the project before I framed it.
Obviously I need to re-arrang or fill it in a little, but I think it's pretty good. 

Oh, and I finished my second quote pillow. It ended up turning out like this:
Well, that's all for today. Bye!


Wednesday, September 25, 2013

Frugal Food, Delicious Dishes

Hi friends. I've made a couple dishes I'm super excited about. 

Broccoli quiche
It might look gross, but it was sooo good. Here's what I did:
First I went to Pinterest for a run-o-the-mill pie crust recipe. 1&1/4 cup flour, little sugar, little salt, a stick of butter and some cold water. I could have chilled it and rolled it out all nice and pretty, but I didn't because I wanted some broccoli quiche, and I wanted it right then and there, so I just pushed the dough into the pan and stick it in the freezer for a quick 10 minute chill.
Then I finely chopped a thawed bag-ful of frozen broccoli, and mixed it up with a little cheese (I didn't measure, I just eyeballed it) and four eggs. Stir stir stir, throw it in the crust, bake at 375 for around 35 minutes and call it a day. Super easy, super yum, and here's the proof:
Mary Clare (above) and Rachel (below) and I were working on decor for Rachel's wedding and we took a quiche break. Totally worth the effort.

Chickpea Curry
Cut up an onion, add some garlic and extra virgin olive oil or virgin coconut oil and soften the onions. Add chickpeas (canned is easiest, these were dried chickpeas that I had let soak for the whole day), curry, cayenne pepper, and salt. Give it some time (maybe 8-10 minutes) and then, right when you're done, stir in a bunch of cilantro. I like lots and lots of cilantro, personally. Serve over white rice and for me, cottage cheese. It might sound gross, but it's oh so good. Sorry there's no measurements for this one, I've always kinda winged this one, but it's hard to mess up, so it's worth a shot. I don't have any pics to back me up on this one, but trust me, it's very good. Oh, and a little lime is a nice touch.

Enjoy!
 

Wednesday, September 18, 2013

D.I.Y. Quote Pillow

Hi friends. So I have these two pillows, and on one side, they have this nice chevron pattern,
But on the other side, it's just plain, so today I decided to make them more reversible-friendly. 
First thing I did was paint a nice gold heart in the middle of the pillow. Not for any reason other than it was the first thing I thought of and it seemed like a good Idea to me.
Then I went to my Pinterest board that I have for quotes, because the lines on the heart weren't perfect, so I decided to use words to distract from that. I found my quote and used stencils to trace it out in sharpie (thin point sharpie).
Then I colored the letters in using black fabric paint.
Ta-Da!!! So that's what I did today while the baby I watch was snoozing. It took about a half hour from start to finish. I have another pillow with a gold heart already emblazoned on its chest (matching set of clearance pillows), so if anyone has some good ideas for quotes, leave them In the comments! Bye for now!


Thursday, September 5, 2013

New Apartment, New Puppy, New Obsession

Hi friends. It's been an unbearably long time, and I do apologize. So, let's update you on the goings-on of the McShane clan.

First things first, we moved into our new apartment in July. It was madness. It's still kinda madness, but the painters are finally coming next week and then I'll finally be able to finish up all the unpacking. It's amazing how much that's affected things. Anyway, here's a quick look at us setting up our main room, and I'll show a pic of how it all turned out in the end when the painters are done.

So, it's set up kinda like this now, but with a larger table and less debris. And James is probably still on the computer, but as you probably noticed, he does move around a bit.

So yeah, love the new apartment. Onto smaller and smellier things! We got another wee pup!
Her name is Sansa, and she has the same dad as Lady. They're the same breed, but their coloration is different (obviously). This is a picture of her taking a bath. Much like Lady, she is quite sad in the bath.
Here she is asleep on my leg at the vet. She's much more dog-like than Lady. Lady is a small, fur-covered child/human who just looks like a dog. Sansa is definitely a dog. Lady has no idea how to handle it.
See? totally freaked out. haha. Lady remains ever a weirdo, like owner, like dog, I guess.
Here's them sitting together normally on the couch/loveseat dealy. They actually get along quite well. I mean, of course Lady is shocked and alarmed whenever Sansa does something dog-like, and yes, Sansa is also a little bit of a bully, but we're working with her and it's getting better. Sansa is a biter, so that's a fun thing to learn to train her out of. She also has the world's tiniest bladder, so even though I let her out every hour and a half or so during the day, she usually still smells strongly of urine and regret. It's a real treat. But she's a really nice pup so enduring the smell is a cross I can easily bear.

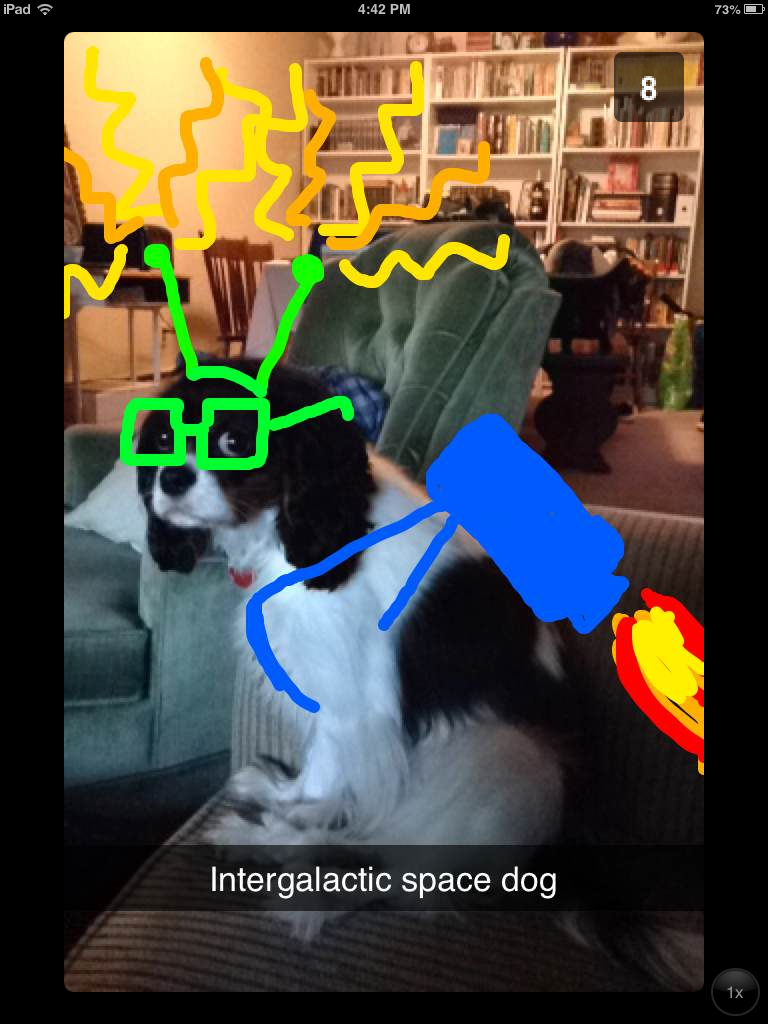
New topic! I just got the ap called "Snapchat" on my ipad. It's so fun! It comes on non-apple products, too, so that's really fun. You send people you're friends with pics, but they only last for about 10 seconds. So you can send hair ideas or weird faces or whatever you want, but the pics don't save to your hard drive unless you save them on purpose, so it feels more carefree. Plus it's fun. Here are some examples of that kind of fun I'm talking about:

I'm a weird snap-chatter, but it's fun, and I love it, so...that's nice. my screen name is "liciemac" if you want to snapchat with me.

Ok, so here's a pic of the four of us:
Yay. Home and happy. Ok, well, I hope everyone has a wonderful day, and I'm going to try to get back to blogging more regularly, so...that's fun...

Alright, bye.